|
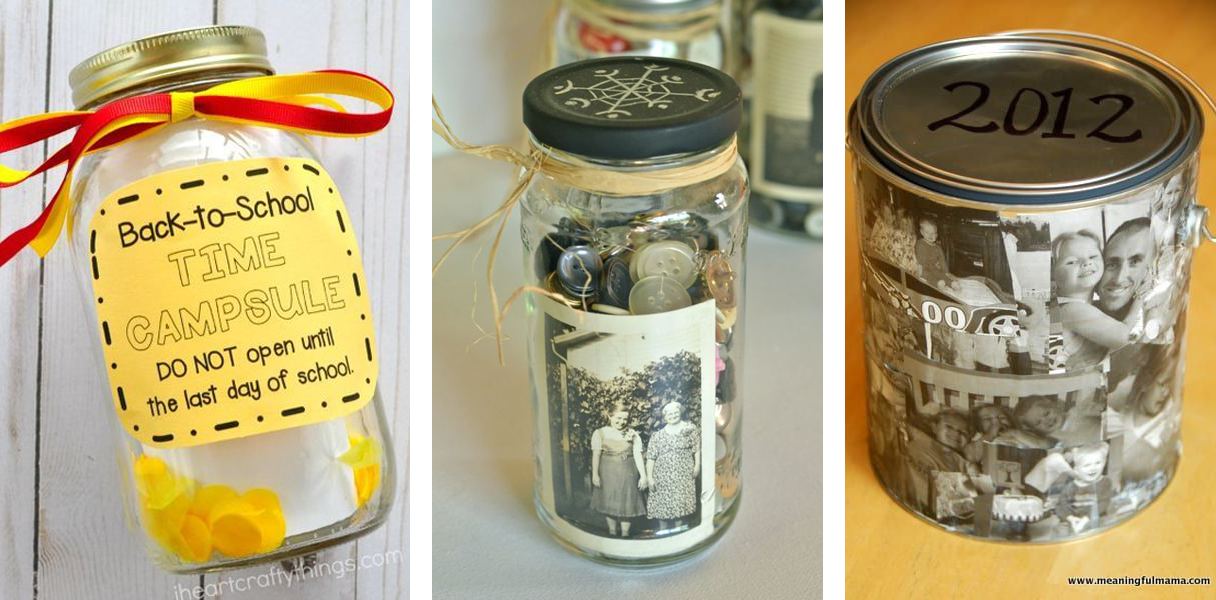
Going back to school can be an exciting time in New Mexico! It's an opportunity for learning and growth. Experiences range from anxious Albuquerque moms preparing kids for the first day of kindergarten, eager UNM graduate students, to nervous Rio Rancho teenagers becoming high school freshman. Today's blog is all about capturing these experiences and creating a memento of the individual's commitment to self-improvement. Our idea is to create your memento with this DIY Back to School Time Capsule! (inspired from iheartcraftythings.com) It's a simple and fun way to document how you changed and grew throughout the year. All you need is a medium to large size Mason jar or another thrifted container, a few sheets of paper, markers, ribbon, stickers, etc. Decorate it as you please! Then, decide what you will place in the time capsule! Start with recording answers to intriguing questions like these:
(kids younger than ten may need help with some of these) 1. What are two goals I have for this year? 2. How will I achieve these goals? 3. What do I hope will change about me this year? 4. Right now, I spend most of my time ______________. 5. Today, my favorite song/book/video/series/game is ______________. 6. As I begin this year, I am most nervous about ______________. 7. One thing I would like to learn this year is __________________. Write out your questions and answers, fold the paper, and put it in the jar. Continue the process, filling the jar with some of your current favorite things or pics of your favorite things (make sure they aren't perishable because you can't open the jar until the last day of school!) Include a selfie from the first day of school too! Finally, close up the jar and place it somewhere safe and out of reach. After the last day of school open up your jar and see how your answers compare to your actual feelings and accomplishments. Did they change? Do you still love the same song? If things didn't go as planned, are you going to keep working on those goals or try something different? Have you tried creating a time capsule from a mason jar or similar thrifted container? Let us know by tagging us on Facebook, Instagram, or Twitter! And consider shopping at Goodwill for the most affordable back to school outfits. Affordability is the reason we say, "Thrifting takes you back to cool!" #Goodwillit #School
0 Comments
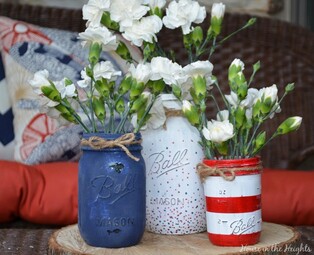
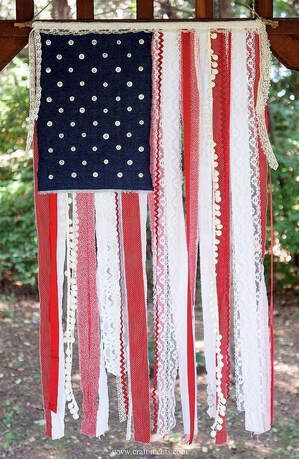
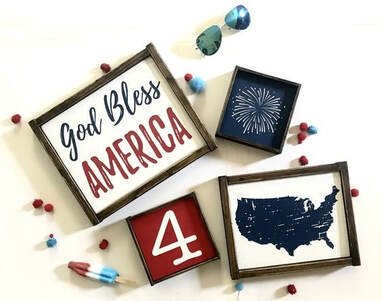
 Example from House in the Heights Blogger, Emily. Example from House in the Heights Blogger, Emily. CENTERPIECES It’s the small last minute details that can really make a holiday feel special! If you’re throwing a BBQ or small family picnic here are a few 4th of July decoration ideas that’ll add that patriotic feel! Using items found at Goodwill, you can make these decorations cheap while also helping support the programs and services we offer by purchasing from our stores! Materials: -Glass containers, Jars, or vases -Red, White, and Blue craft paint -Twine -Your choice of flowers For these centerpieces you’ll need just a few glass jars or vases from Goodwill, craft paint and your choice of flowers. They’re super easy to make and they create a homey rustic feel to your picnic. They all don’t have to be mason jars either. The more different each jar is the more unique your centerpiece will be.  Picture from www.craftiments.com Picture from www.craftiments.com RUSTIC AMERICAN FLAG Materials: -Lace material (find a dress or table cloth) -Red fabric (red curtain, blanket, giant shirt) -Navy Blue Fabric (t-shirt, blanket, or curtain) - White Buttons or White fabric Paint -Rod or wooden stick for assembly -Hot glue /Glue gun This rustic flag might take a little longer than the centerpieces but it looks really beautiful and can even play as a nice backdrop for 4th of July selfies! This flag is meant to look rustic so finding all of your fabric/ribbon at your local Goodwill, will save you money and help you recycle material. When putting it together cut the white and red fabric to the desired length. The one pictured is 2’ long, however you can make it as big or as small as you want. Hot glue one end of each strip to the rod or wooden stick until you have 13 strips. Then cut out a rectangle from the navy blue fabric and glue one end to the far left side of the rod, on top of the strips of red and white fabric. Then lastly add the buttons (stars) on the navy blue fabric. You can paint white stars using fabric glue. However the buttons make it look more rustic! Then to finish it off, cut twine or rope the same length as the rod and tie each end to the ends of the rod. This is so you can hang your flag anywhere!  Picture from Pinterest Picture from Pinterest PATRIOTIC SIGN Materials -Used wooden frame -Craft paint -Card Stock -Letter Stencils or Stickers (optional) This is another simpler one that doesn’t require many materials. Find a couple picture frames from goodwill and remove whatever picture is there and replace it with either, white, red, or blue cardstock. The next step is completely up to you. You can create hand lettered signs or print them out yourself. You can paint fireworks like the one pictured above! The options are endless. Browse the internet for more design ideas if you’re feeling stuck. We hope these DIY decorations help brighten your 4th of July! If you try one of these let us know, by tagging us on Facebook or Instagram at Goodwill NM. We’d love to see it! |
Archives
September 2023
|
- Home
-
Free Services
- Service Center Hours
- Community Conference Room
- Employer Services
- Career Specialists
- Film Industry Support
- Production Assistant (PA)Training
- Job Search Help
- JumpStart Youth Program
- GoodSkills Classes
- Next Steps Reentry Services
- Seniors 55+ Employment
- Veterans' Employment
- Veterans' Housing
- Veteran Family Services
- Program Surveys
- Shop
- Donate
- Jobs
- About Us
- Blog
- Events
©

